5 steps and 5 minutes to building your very own beautiful, customized media kit
Media Kits bring together your social profile data, website audience, highlighted content, audience information, brand partnership examples and even your rates all into one place. Media kits auto-update so as you build your audience, so your media kit will always be current.
Now let's breakdown each step in the process. To jump ahead to a step click the link below.
- Details Section
- Connecting Your Data Sources (social accounts)
- Design Your Content Grid
- Add Pricing Packages (Rates)
- Add Your Brand Partnership Examples
1. Details Section

-
Upload your profile photo
-
Choose your color palette from 4 custom colors
-
Add your Full Name
-
Add your e-mail address. This is the e-mail you want brands to e-mail you at.
-
Choose your primary locations. This is usually where you are located or where your audience lives
-
Categories. What are the main topics you're known for? Pick up to 3.
-
Provide the URL of your website or primary social account profile
-
Complete the about section. This is where you can tell potential brands a bit more about who you are.
2. Connecting Your Data Sources (social accounts)

Choose the social profiles you want to showcase in your media kit. If you’ve signed up with Facebook your Facebook and Instagram profiles should appear in the drop-down. If not or if you want to add other sources (ie. YouTube), click the “Add New” button.
These social profile connections are key to highlighting your best content and audience reach in your media kit.
3. Design Your Content Grid

Design a beautiful content grid that shows off your style. Mix and match content from any of your connected social profiles.
- Click on any of the squares in the grid
- In the side panel select which social profile you want to add content from
- Select the desired post and hit save
4. Add Pricing Packages (Rates)
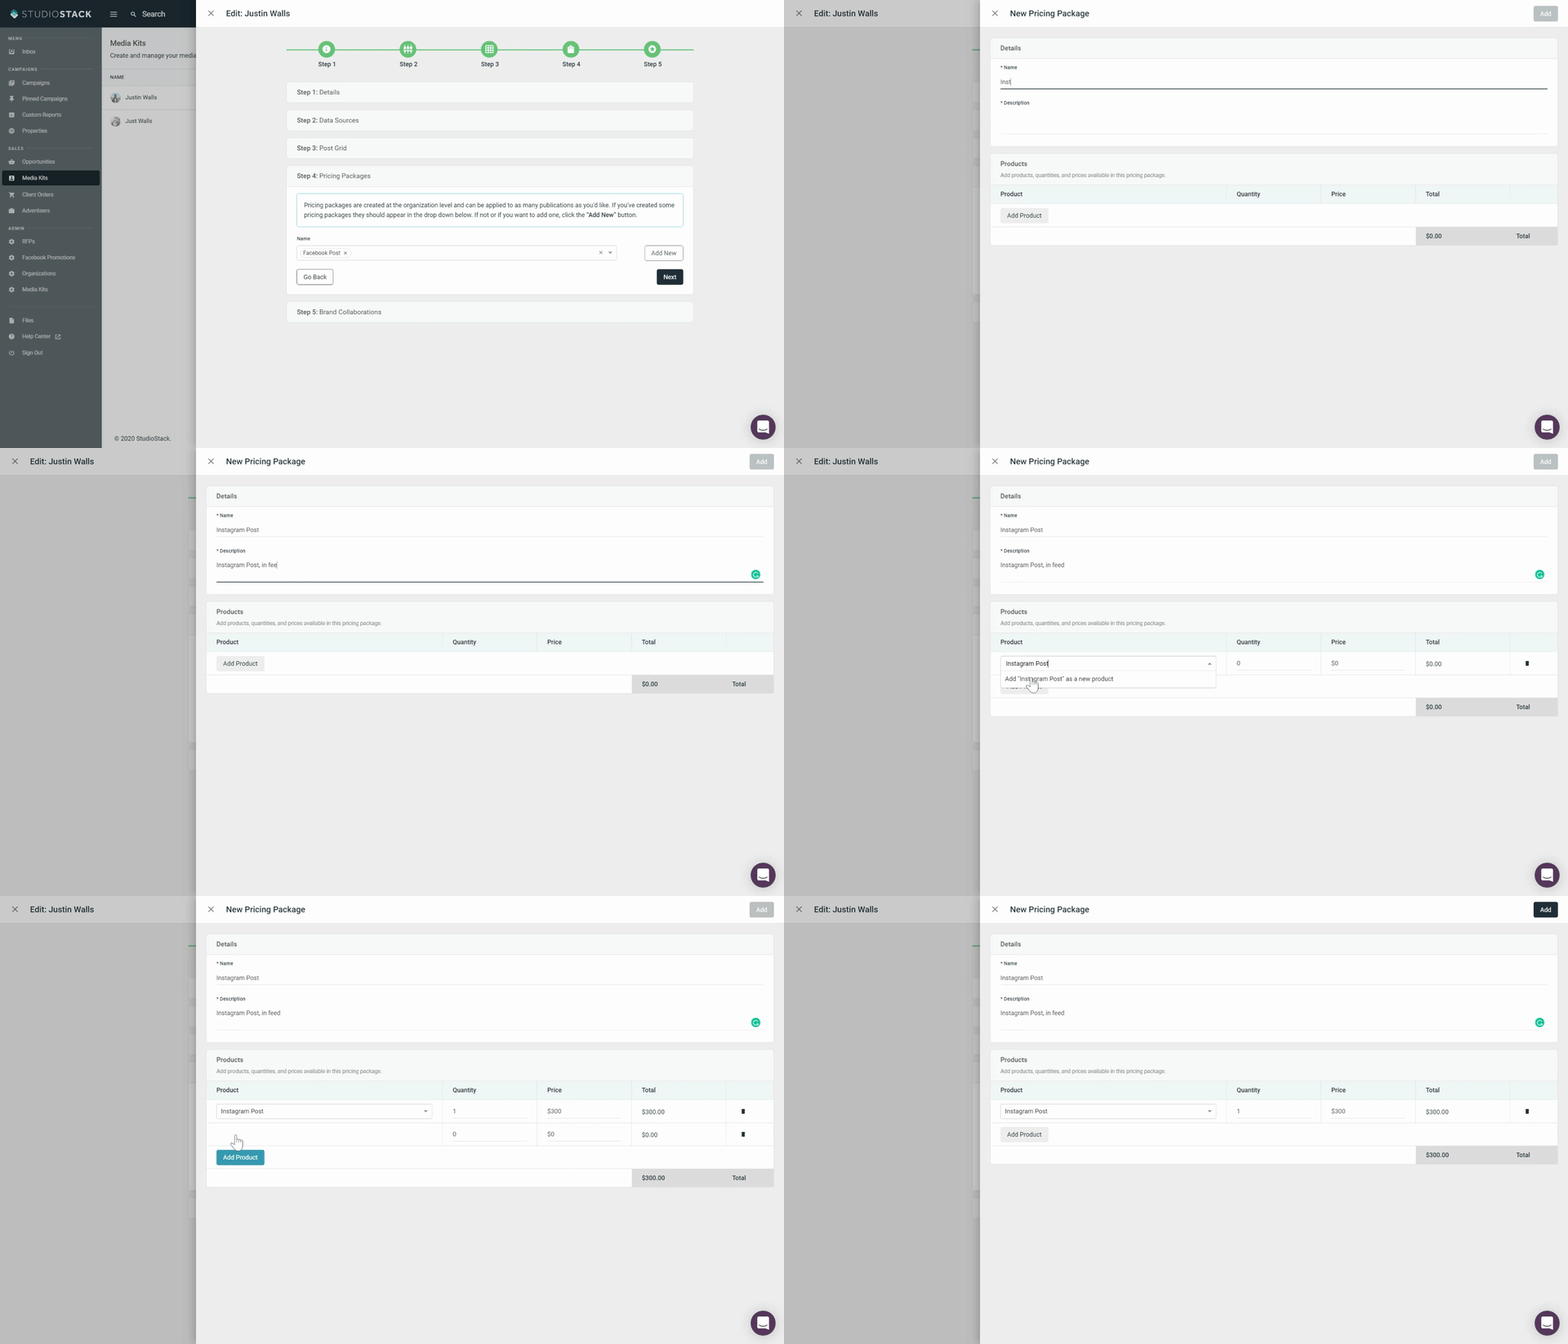
Create and display your custom pricing packages. Pricing packages are ad products you sell to brands. Pricing packages could be an individual post, such as a sponsored article, or a sponsored Instagram story, or a combination of various posts and brand partnership activities.

- Name: This is the package name that brands will see when viewing your pricing package
- Description: Add context to the pricing package so that the brand knows what they're getting
- Add Product: This is where you will name the individual ad products or brand activities that make up your pricing package. Here you will name each individual product, select the quantity that are included in this package, and a price per item. For example, you may be including 3 Instagram stories, at $100 each as a part of this package.
5. Add Your Brand Partnership Examples
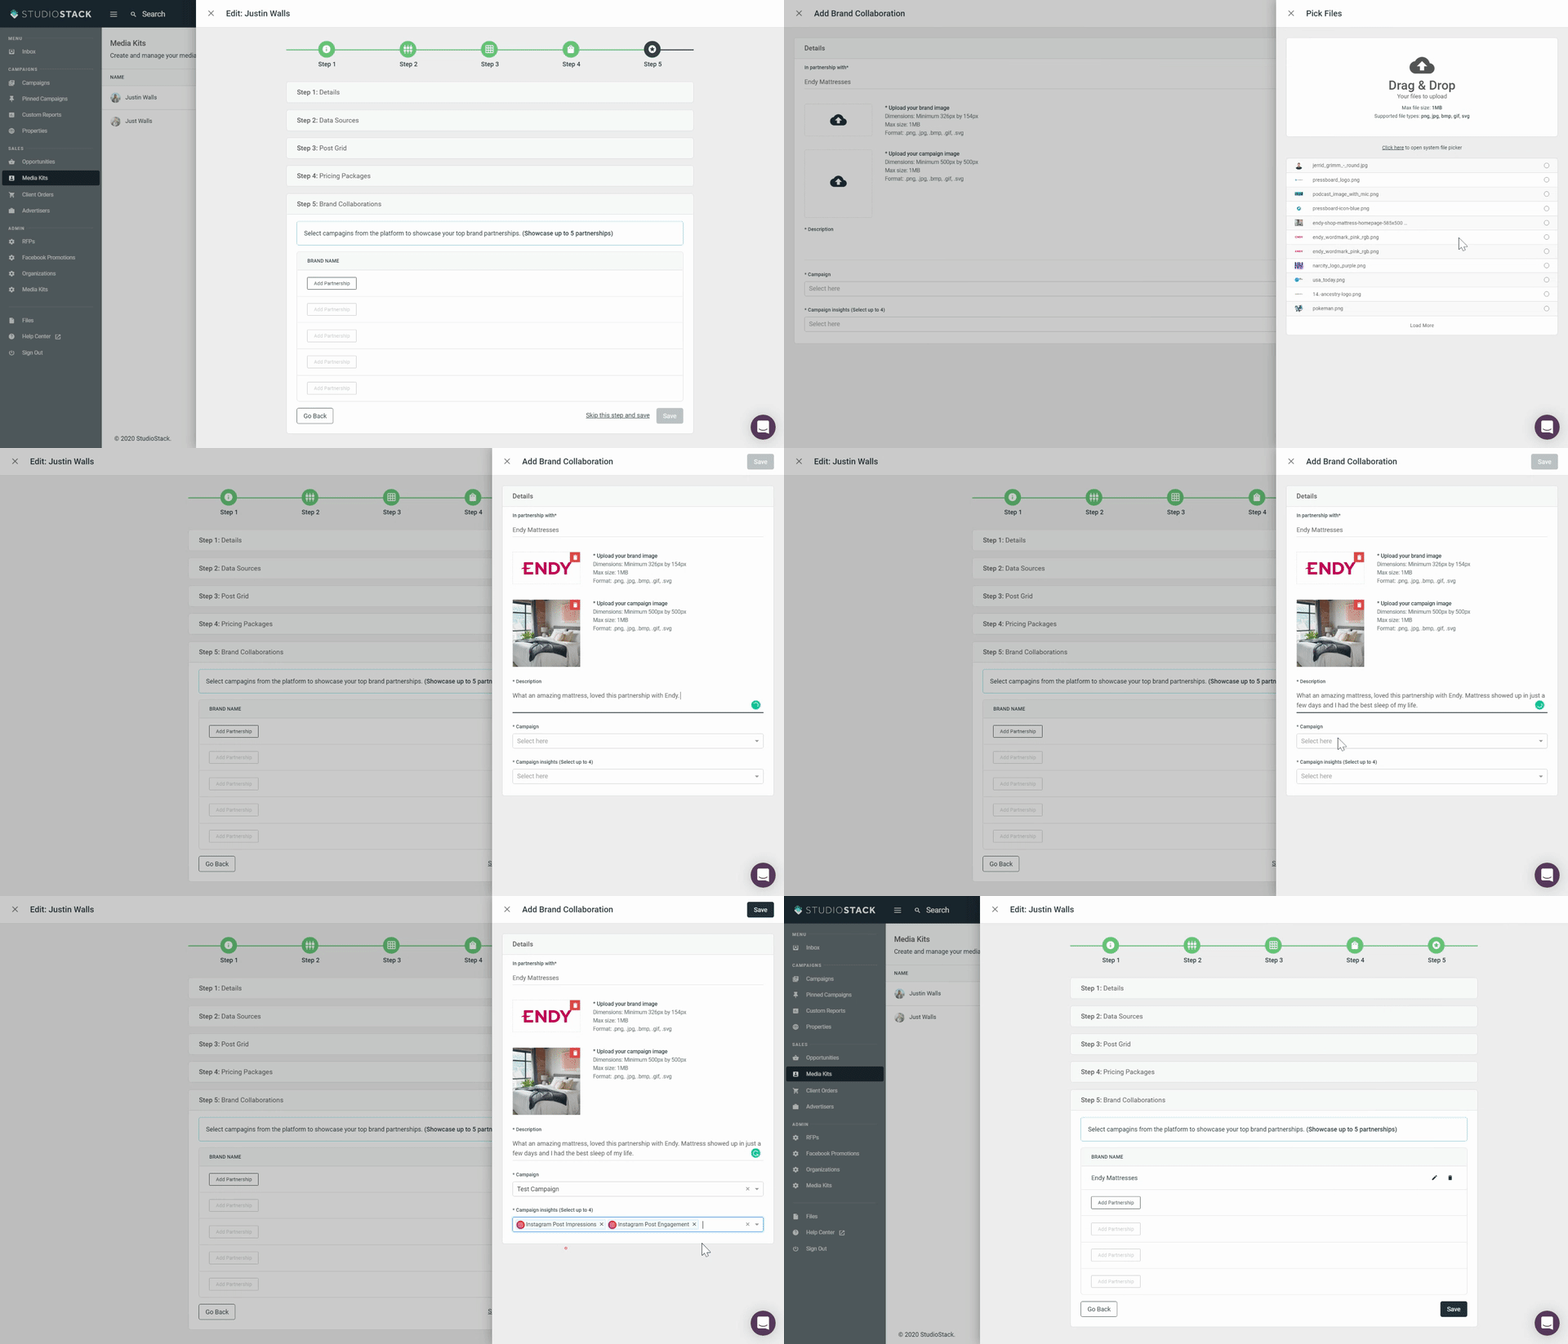
Showcase previous work you've done with brands. In order to complete this process, you will need an existing Campaign measured through Pressboard. For more information on setting up Campaigns, see this help article.

Click on Add Partnership to add a new partnership. You can add up to 5 brand partnerships to your media kit
- Under Details name the partnership, add the brand logo, an image that showcases the campaign (for example a screenshot of a post). Then add a description of the campaign.
- Next, select the existing Campaign from your account.
- Finally, select which specific Campaign Insights you would like to showcase from this brand partnership. The available metrics are available in the dropdown list. You can select up to 4 metrics.
- To edit your media kit, click Edit
- To share your media kit, click Share URL. This will open your media kit in a new window. You can then copy and paste the URL of the page and send it to brands, add to your social profiles or include in e-mails.

Congratulations! ✨✨✨
