This article explains how to connect various data sources to your account in order to activate analytics collection across campaigns
Pressboard Studio gives you the ability to measure deep content/social/ad analytics on all of your campaigns, in one place.
Refer to What We Measure for more information about the Data Sources we currently support in Pressboard.
How to connect your Data Sources:
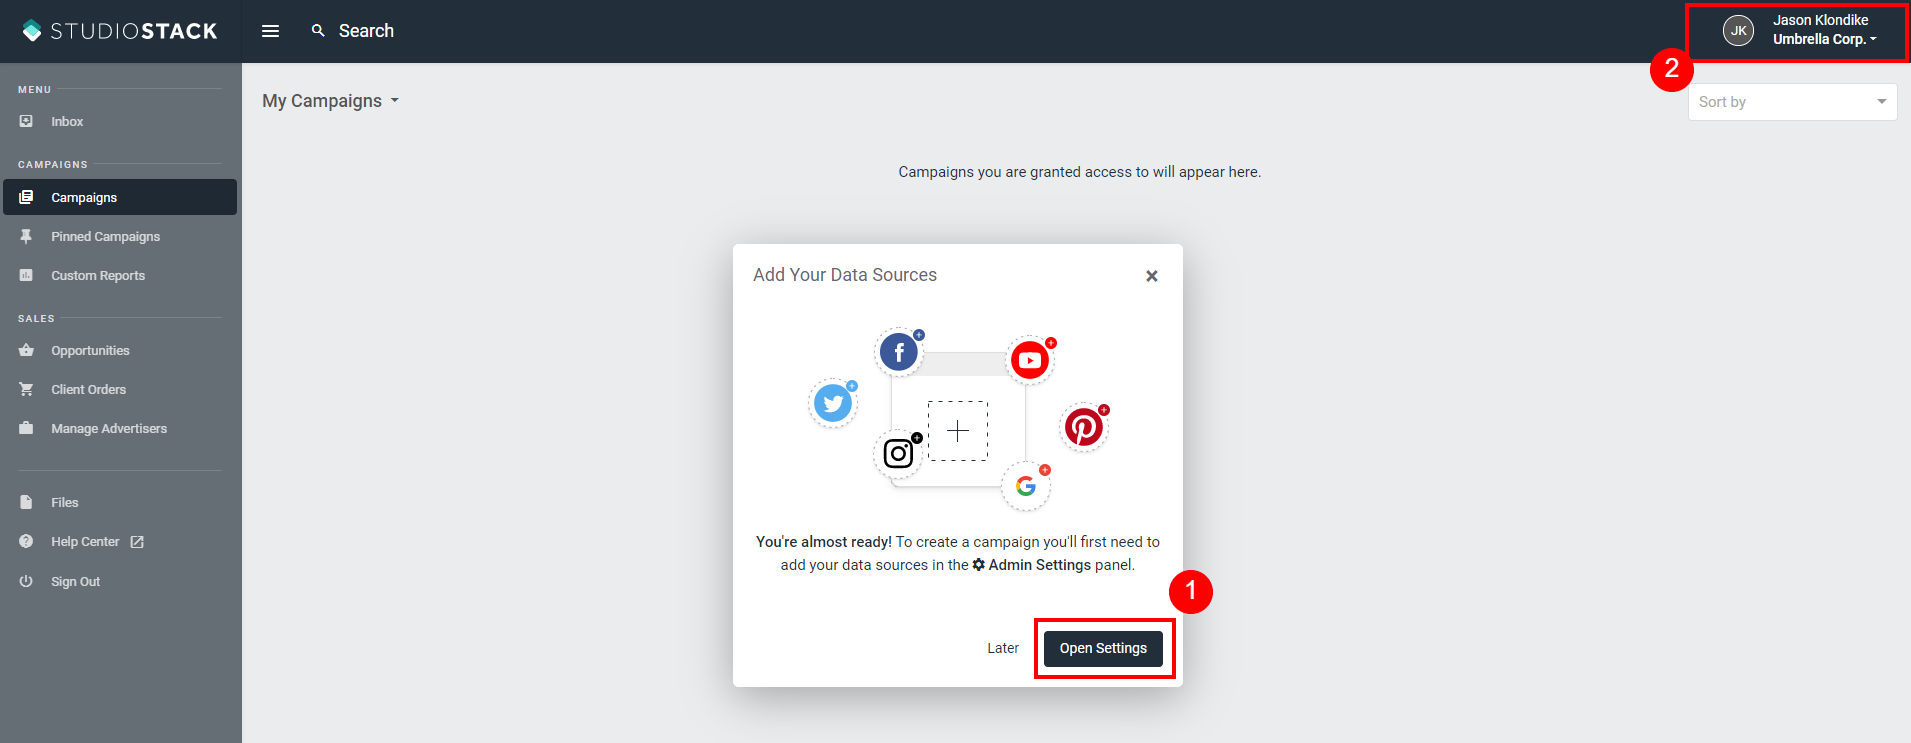
- If you are NEW to Pressboard Studio, you will receive a pop-up with a link to the Settings area prompting you to connect your Data Sources . Click the 'Open Settings' button, then within the window that appears from the right (Admin Settings area), click on the 'Data Sources' tab
2. If you are an existing user, simply click on your User name/profile
(top-right), click 'Admin Settings' from the drop-down menu, then toggle over
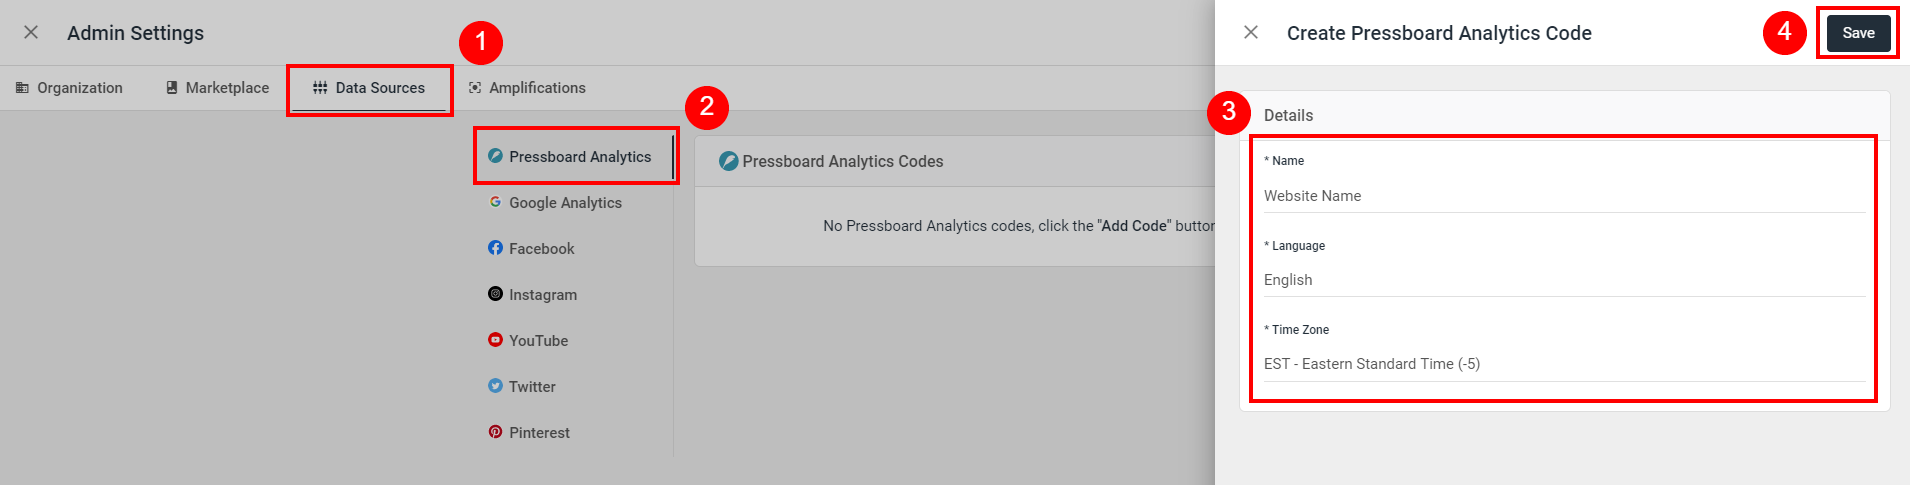
to the 'Data Sources' tab
Pressboard Analytics - ENTERPRISE ONLY
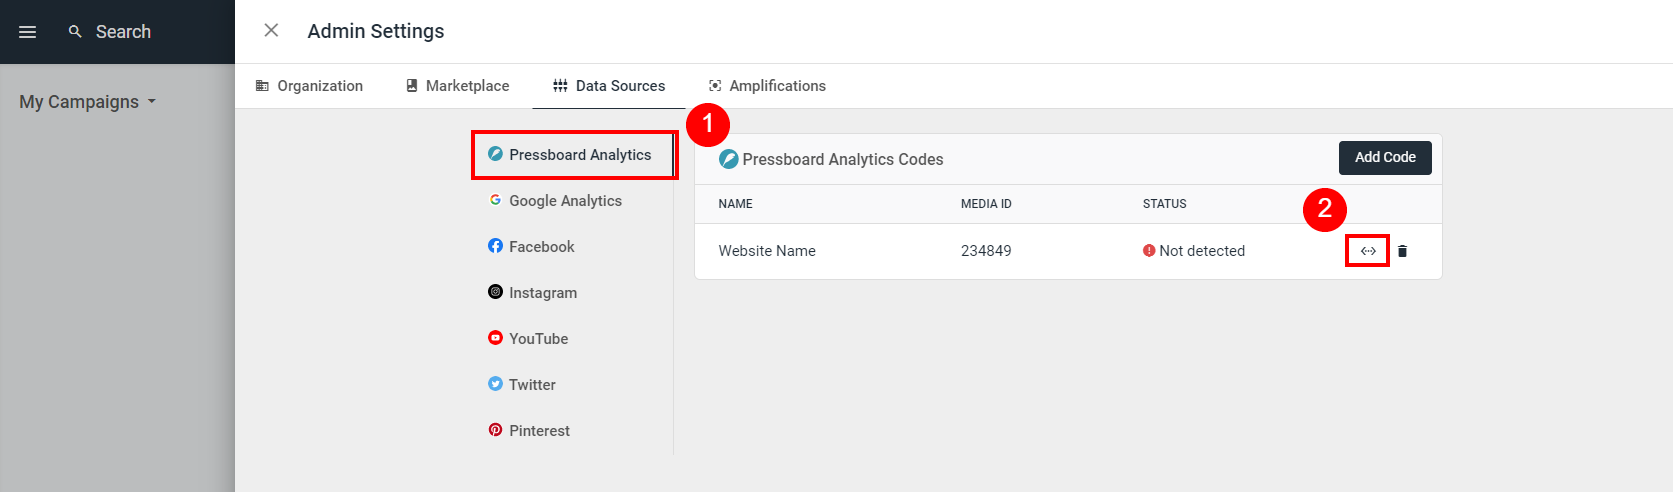
Click 'Add Code', then give your Pressboard analytics profile a 'Name', choose a Language and your Time-Zone and click 'Save'. Later on, you can come back to this profile to retrieve the associated javascript/scroll depth tag for implementation on your site. Click the Expand icon which looks like this (<...>) for additional instructions. Note: You may opt to use a singular Pressboard analytics set-up across ALL the sites you operate/work with. Pressboard recommends this.
Google Analytics / Google Ads Manager:
Click 'Add Profile' or 'Add Network', then click 'Add Google Login', input your credentials (you must have Admin privileges in GA) and follow the prompts in the pop-up window to establish the connection and begin adding GA profiles to your account.

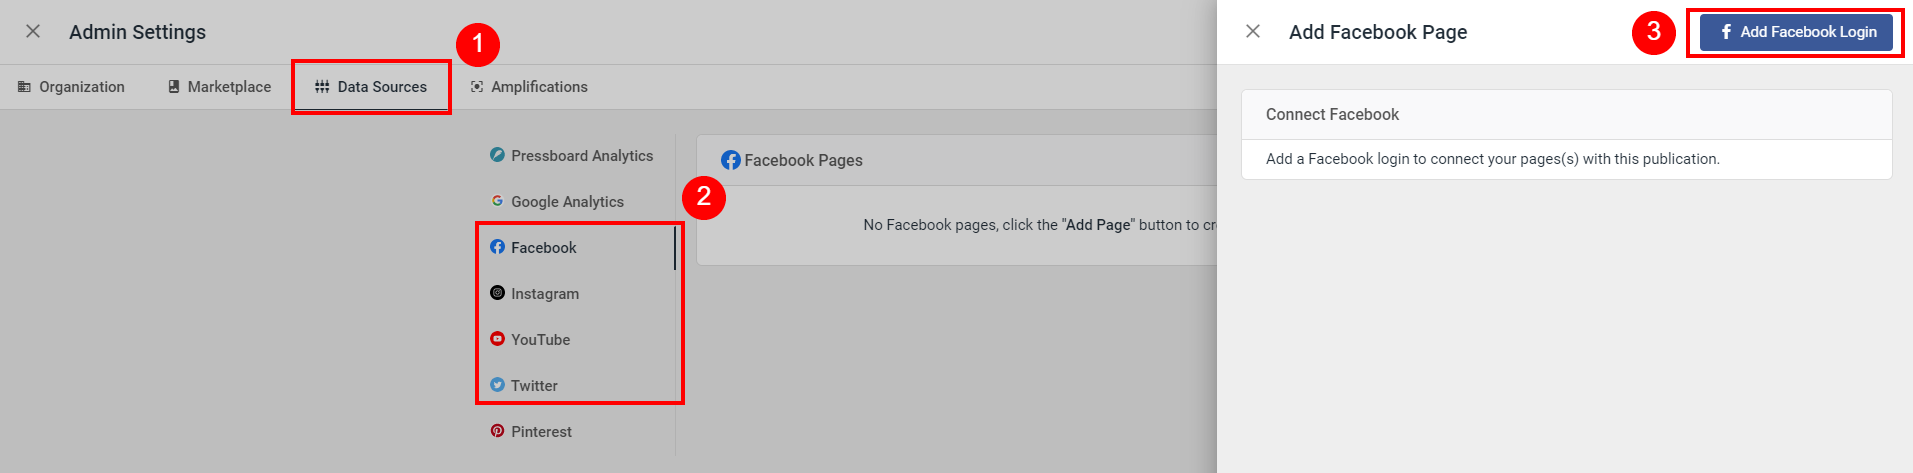
Nativo / Instagram / Facebook / YouTube / Twitter:
Click on either 'Add Page', 'Add Channel' or 'Add Account', input your credentials (you must have Admin privileges across each social/promotional channel) and follow the prompts in the pop-up window (ensure to click 'Allow' when asked to provide read-only access) to establish the connections and begin adding your respective social Pages/Channels to your account.
Connecting Nativo will require you to have your Nativo client "Token" and "Secret" on-hand.
Now that you have successfully connected your data sources to your Pressboard Studio account, you're all set to begin creating campaigns in the platform and activating analytics across those campaign's content/social/promotional activity.
Read next: How to Create Campaigns and Activate Analytics
See also: Viewing Reports