What is a 'custom metric' ?
A bespoke metric created within the custom metrics workflow. If you have specific requirements around Key Performance Indicators (KPI) you want to track in Pressboard - which go beyond standard data points you will want to explore this feature.
Launch your metric/s in Report Components to use in campaign reporting:
There's typically two ways you can leverage custom metrics. 1) Story reports with Campaign workflow and 2) Custom Reports. We have two advanced modules to support this; Report Components and Story Reports. To enable the required 'data admin' access please reach out to your Customer Success Manager.
How to create bespoke widgets
Once live in your account, you're able to proceed with creating entirely new reporting widgets i.e highlight metrics and charts. Let's take the example of a single metric to add to a Story Report in Campaign Workflow. 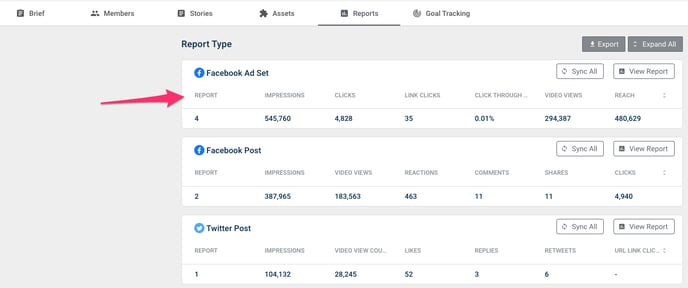
1. Head to Report Components and select 'New Component' to enter the workflow. 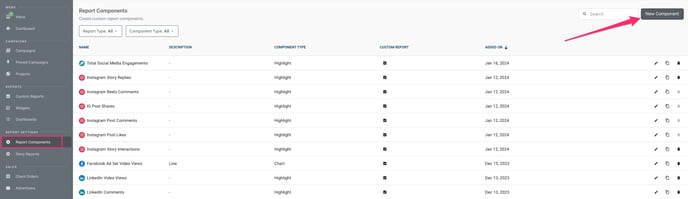
2. Select Highlight to create a single metric 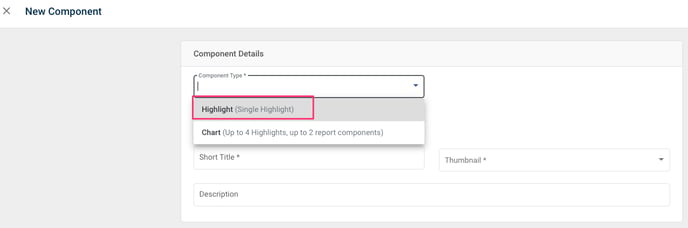
3. Complete fields with an asterisk. If the metric spans multiple data sources, select 'Pressboard' as the Thumbnail since the metric is agnostics, otherwise select the relevant Data Source. 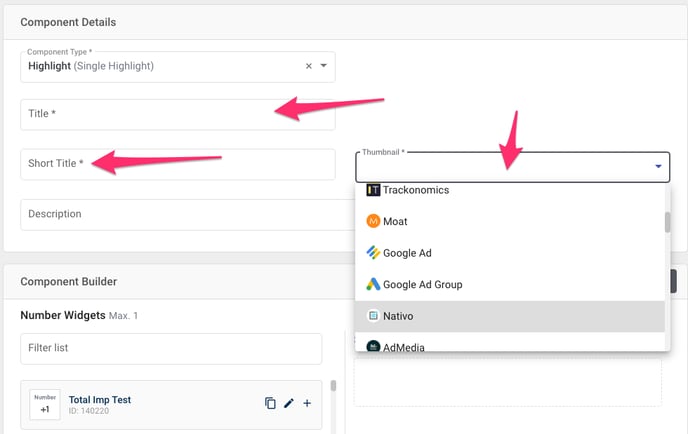
4. Now launch the widget builder by selecting 'New Widget'. 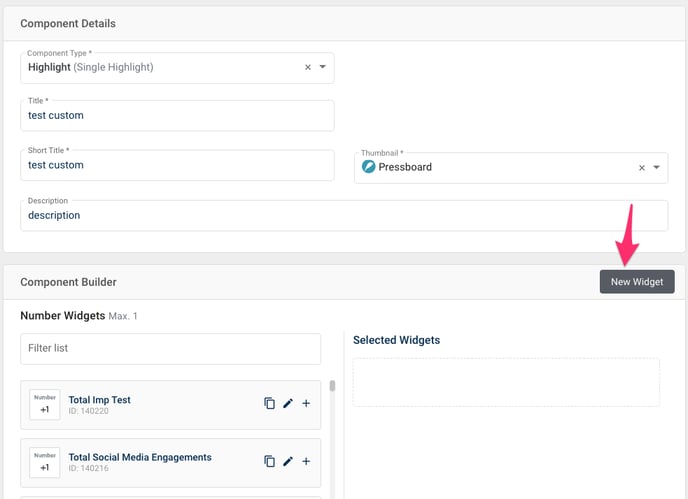
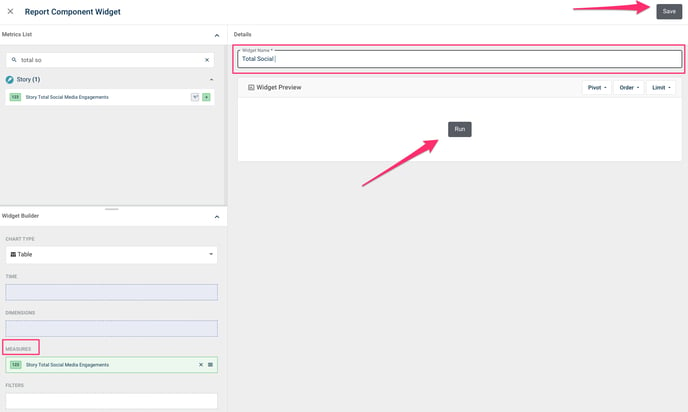
5. Enter the name of your custom metric in the search, it will be listed either under 'Story' or the relevant Data Source.
6. Select 'Number' under Chart Type once the measure is selected and run the query. This should produce a single numerical value. Apply a name and hit 'Save'.
You will land back on the first screen where you can select the newly saved widget and complete the process. 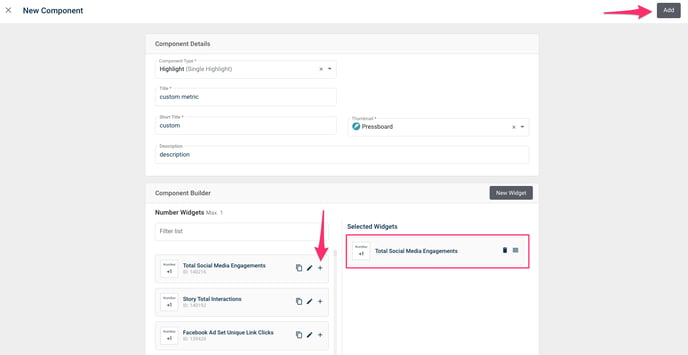
The component is now searchable within the Report Components library and available in the Custom Report builder. You can update any Custom Report Templates accordingly and you can make any edits if needed at a later stage.
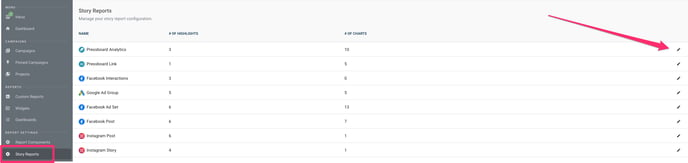
To add components to a Story Report:
Head to Story Reports from the main menu and click to edit next to the Report type.
You're taken to the edit screen for the existing Story Report broken down into Highlight Components and Chart Components. Note, up to six Highlights can be selected to display in each summary.
Feel free to add, delete or reorder the components as needed by dragging up and down. 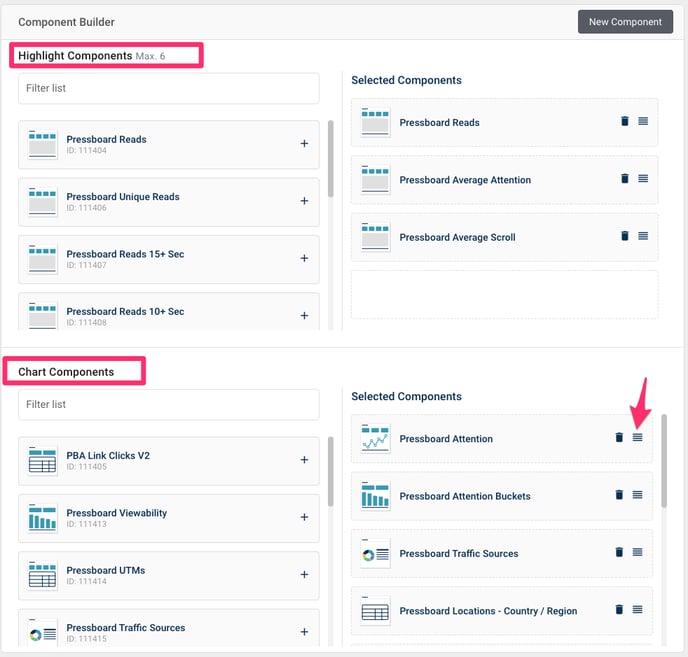
Highlight components load for each report type in the Reports. You have allowance for up to six individual metrics to display for your reports as a summary of performance. 
Chart components load when you select the View Reports option for any Report Type.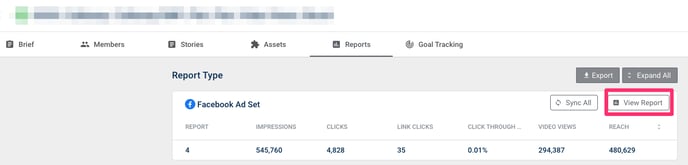
Goal Tracking:
Note, you can proceed to add your custom metric in Goal Tracking as soon as the custom metric is live in your account. This process is independent of creating Report Components.
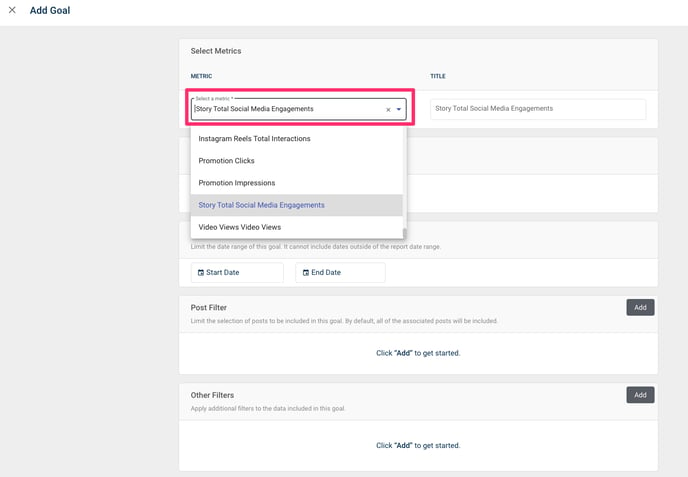
1. In the required Campaign head to Goal Tracking, you will see sections to add Goals for each Story. 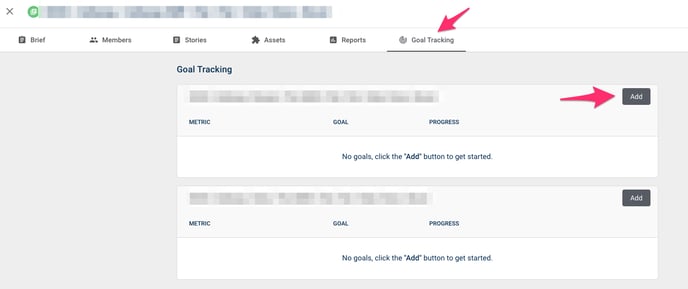
2. Select 'Add' to proceed to adding a Goal. You will find your Custom Metric already listed, as long as the Report Type has been added. For example, if the custom metric relates to Meta Instagram, you must have the the relevant Instagram Report added to the Story already.